
How I created a Beautiful Peacock Inspired Cocktail Cabinet
- gracie39sattic
- May 16, 2021
- 7 min read
Updated: Sep 18, 2021
The Idea
I love my job...creating beautiful statement pieces from old unloved furniture just gets my creative juices flowing! I had bought this Beautility Art Deco Cocktail Cabinet last year, and I'd been working on some ideas for how I was going to refinish it, I'd even bought some fabulous wallpaper I was going to use. Then I got an enquiry from a client who was looking for a cocktail cabinet. I sent her photos of both this one and another I had in stock. She decided this Beautility was the preferred piece and was keen to see my ideas for re-finishing it. I sent her the mood boards I'd been working on, but my ideas weren't quite right for her new house and the décor she had in mind. So we worked together, to create something completely bespoke. The brief was Peacocks, Teal, Royal Blue and Gold! Just a fabulous combination and I couldn't wait to get started!

The first step was to set about looking for wallpaper samples to send to my client, there were so many gorgeous ones to chose from, and we decided on this one which worked perfectly with the colours my client wanted. I then worked on mood boards and designs which I sent her to help visualise the finished piece. After many messages getting the details just right, I created a Photoshop image of the final design and we were good to go!

I had several ideas I was so excited about trying out.
Firstly, a new range of stencils and wooden onlays had been brought out by a collaboration between Made by Murphy and Stencil Up. The Peacock was just perfect and my client agreed! You can see how I added these later on. I'd also seen some fabulous handles to replace the ugly non-original handles the cabinet came with, beautiful brass Peacocks to really give the it the wow factor!
The Prep
As with all the cabinets I work on, this one was to be stripped of its doors, drawers, hinges and back, basically everything came off! A top tip at this stage before you remove everything from the piece, is to take photos, lots of photos! As these cabinets can be very tricky to put back together! Everything was then given a thorough clean. For this I used Fusions TSP Alternative. The whole piece was sanded back using my trusty Festool sander. As the cabinet is constructed of veneer, I had to be very careful not to go through the delicate surface, especially where we were going to be keeping the beautiful wood grain on show.

The mirror in the back of the cabinet which had some age related discolouration, was replaced with a new piece of mirror cut to size. This is fairly inexpensive and easy to do at a local glazier. The striped glass on the bottom of the inside was in relatively good nick, however I removed it and used some metallic paint to tidy up the gold lines where the original paint had chipped a little.
The Painting
My client and I had decided on a beautiful teal blue on the outside of the cabinet and Fusion Mineral paint Liberty Blue on the inside of the cupboards and drawers. The teal blue I custom mixed from Renfrew Blue and Liberty Blue. It took a few iterations to get the perfect Peacock blue my client was looking for but we got there in the end! I used a Two Fussy Blokes roller and a small flat brush for the painting and to get a lovely smooth finish.

The Decoupage
The back of the cabinets and the base of the drawers were going to be decoupaged in the beautiful Peacock paper my client had chosen. I did this by lying the cabinet on its back, as I wasn't able to remove these particular sections of the cabinet. I made a template using A4 paper and tape to get the right shape and size then transferred this to the wallpaper, making sure I had the part of the image I wanted. I used a cutting mat and a very sharp stanley knife to cut out the section and repeated this for the other side, making sure both pieces had an identical image. I then stuck this to the back of the cabinet using PVA. When doing this use a very thin layer on PVA otherwise you are more likely to get air bubbles. Any air bubbles that do form can be smoothed out using an iron on low heat and baking parchment. Then the paper was varnished using Polyvine Flat Wax Finish Varnish.


The same process was repeated inside the drawers once they had been painted in the liberty blue inside and edged with gold. The drop down section of the cabinet was spray painted in gold, as was the back piece, which holds the mirror in place.
The Handles
For some strange reason this cabinet came with odd un-matching handles on the drawers. We had already decided to replace the ones on the doors with the stunning Peacock handles bought from Two Moustaches on Etsy, however I decided to go on the hunt to see if I could find two more to match the two nicer ones on the drawers.

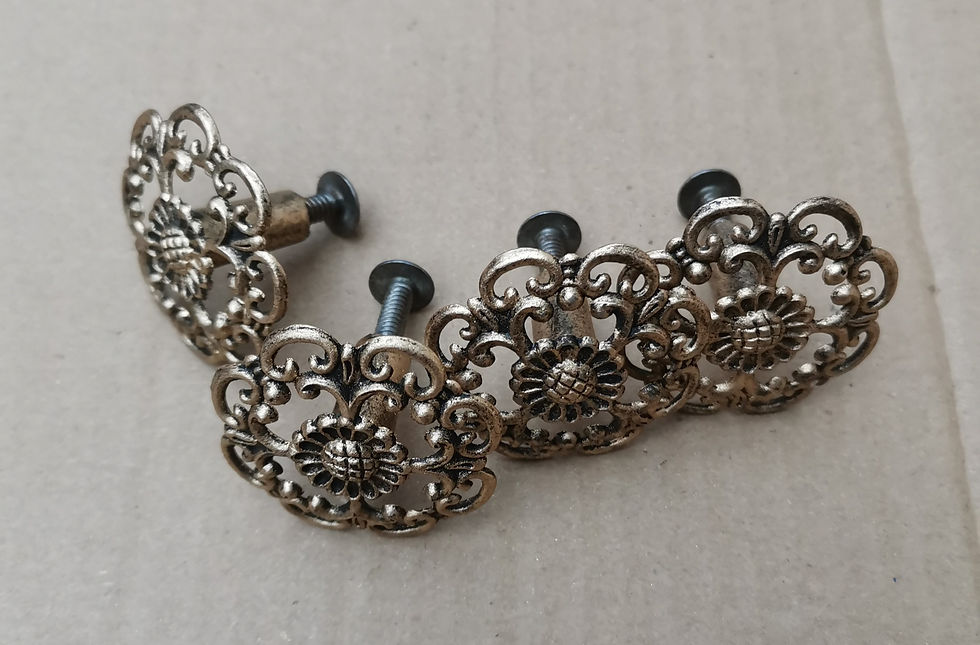
Since becoming a furniture painter I have become part of Facebook groups and a part of a massive community of lovely people who all love to help each other out! I put out a post asking if anyone had anything similar to the handles I needed and my request was seen by lovely Amy from Pinkyswifts who very kindly sent me these four matching absolutely gorgeous handles. All they needed was a good clean and painting in the same gold as I used on the Peacock handles which was Posh Chalks Pale Gold.
The Doors
As I mentioned previously we were keeping the doors to celebrate the absolutely stunning woodgrain. After carefully sanding back the varnish, I treated the veneer with a couple of thin coats of OSMO Oil. This not only protects the wood but also nourishes it and brings out the fantastic woodgrain beautifully. The new Peacock handles were ever so very slightly the wrong size for the existing holes. I overcame this by using filler and then mixing acrylic paint to match the colour of the wood.

The inside of the doors were painted in the Liberty Blue and then I used the gorgeous Peacock Stencil in the Posh chalks Pale gold, to create even more glamour when the doors were opened.

The Drawers
One of my ideas was to use another stencil, this time a Peacock feather which I had bought a while ago from Dizzy Duck Designs, and stencil it gold directly onto the wood grain of one of the drawers. The size of the design fitted perfectly and I was so happy with how it looked once that all important OSMO Oil varnish was added. I videoed the process so you can see just how amazingly satisfying it was!
The other drawer was painted in the teal blue which perfectly showcased the stunning antique handles.

The shelves of the cupboards were also painted in the teal blue, edged in gold and also stencilled with the Peacock feather, this was a bit of an added extra surprise for my client as my creativity was flowing freely by this point and I couldn't stop!!

The Hardware
All the hinges and door clips and mechanisms for the drop down door were all scrubbed clean with Pink Stuff, unfortunately, however, they did not come up shiny brass which would have fitted in with the colour scheme of the piece. Therefore, they had to be scuff sanded cleaned again and spray painted with Rustoleum gold spray paint.

The Finishing Touches
As I mentioned previously, I had a few idea's I really wanted to try out on this cabinet. The final flourish to the outside of the cabinet, was a wooden Peacock onlay from the Lotus Collection in the same design as the stencil on the inside of the doors, created by the super talented Shona Murphy from Made By Murphy in collaboration with Stencil Up. As soon as I saw this onlay, I knew they had to adorn this cabinet! Luckily my customer agreed!


I used the same colour palette, starting with a base coat of Liberty blue, then dry brushed teal and gold in different areas, picking up the edges of the wood with the gold to make it really stand out! The onlays are self adhesive, you simply peel the backing off and place them where you want them. The glue is super strong and so I was confident they wouldn't be going anywhere!
I installed a gold wine glass hanging rack to one of the cupboards which I bought from Amazon, to make this a truly functional cocktail bar!
And the final touch was an LED motion sensor light, also bought from Amazon, which I fitted above the mirror inside the bar section which lights up when the door is opened, every bar needs a cool motion censor light right?!

Reassembling the Cabinet
So now all the work was done, I was ready to reassemble! The doors and the drawers were easy enough. Getting the hinges; that form an integral part of the cabinets engineering and allow the sliding doors and panels to move in and out; in the correct place; was far more tricky! We ended up (I say we as I needed my lovely hubby's help with this!) having to take out the back section and the mirror out again, as this had already been re-fitted, so we could get the hinges in the right position. After a fair bit of faffing we managed it and the door opened and closed beautifully once again!


And finally it was finished! Time for some stylish staging and a photoshoot! I cant express in words just how much I enjoyed the whole process of creating this gorgeous Cocktail Cabinet! My client was over the moon and actually made me cry with her lovely review (see below) happy tears of course!


Thank you so much for reading! I hope you have found it enjoyable and useful!

I have two more fabulous cabinets in stock check out my Available to Commission Page if you would like your very own Gracie's Attic Creation. Please do feel free to get in touch for a chat!


Comments